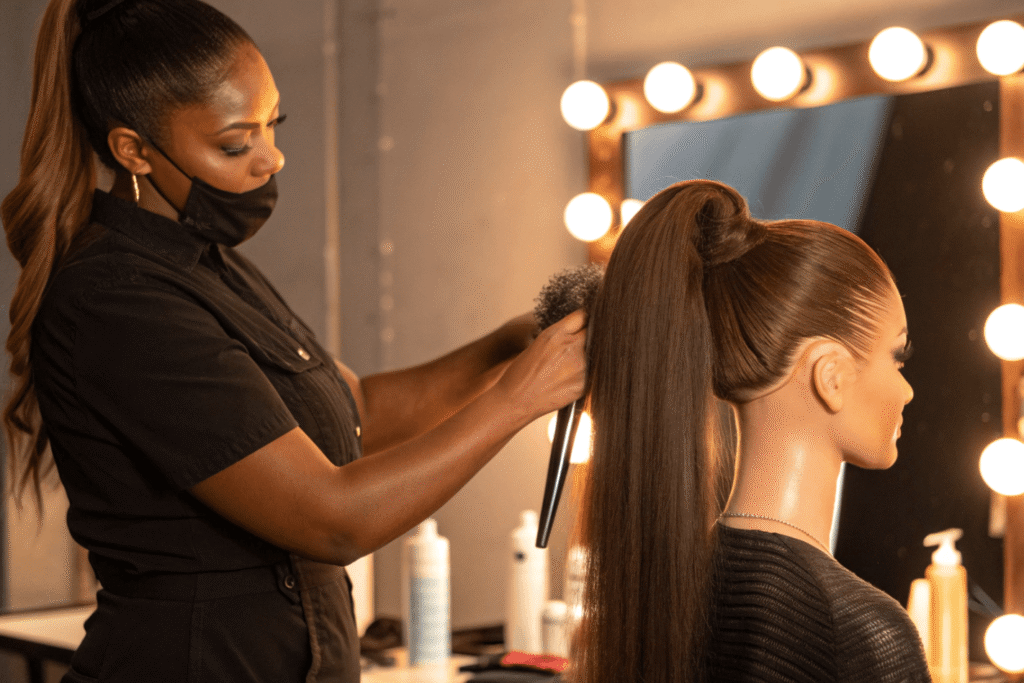
If you’ve ever pulled a favorite human hair wig off its stand and felt that stiff, hay-like texture, you know the sinking feeling. Maybe the ends look frayed, the color has lost its glow, or it tangles if you so much as look at it. I’ve been there—usually after a stretch of heat styling or a few too many “quick spritz and go” days. The good news: a dry wig isn’t the end of the road. With the right routine, you can restore softness, shine, and movement without compromising the knots or the lace.
Revive a dry human hair wig by clarifying product buildup, washing with a sulfate-free shampoo, and performing a deep conditioning mask with gentle heat for 15–30 minutes. Follow with a leave-in and a light oil on the ends, minimize heat styling, and trim brittle tips. For thinning areas, use fill-in fibers or gentle ventilation techniques—avoid plucking. You can safely recolor or gloss with professional, low-ammonia formulas, and consider salon refurbishment for severe dryness, shedding, or lace damage.
Before we dive in, remember: unlike your natural hair, wigs don’t get scalp oils. They rely entirely on external care. Once you get comfortable with the rhythm—clean, hydrate, protect—the transformation is dramatic. Let’s walk through it step by step.
What deep treatments restore softness and shine effectively?
Why wigs get parched (and how to spot it)
Human hair wigs dry out fast because there’s no sebum to coat the strands. Add heat tools, hairsprays, hard water, and regular wear, and the cuticle gets roughed up. Signs your wig needs rescue:
- Feels coarse or squeaky when you run your fingers through it
- Tangles easily, especially at the nape
- Looks dull even after styling
- Ends look frayed, and styles fall flat
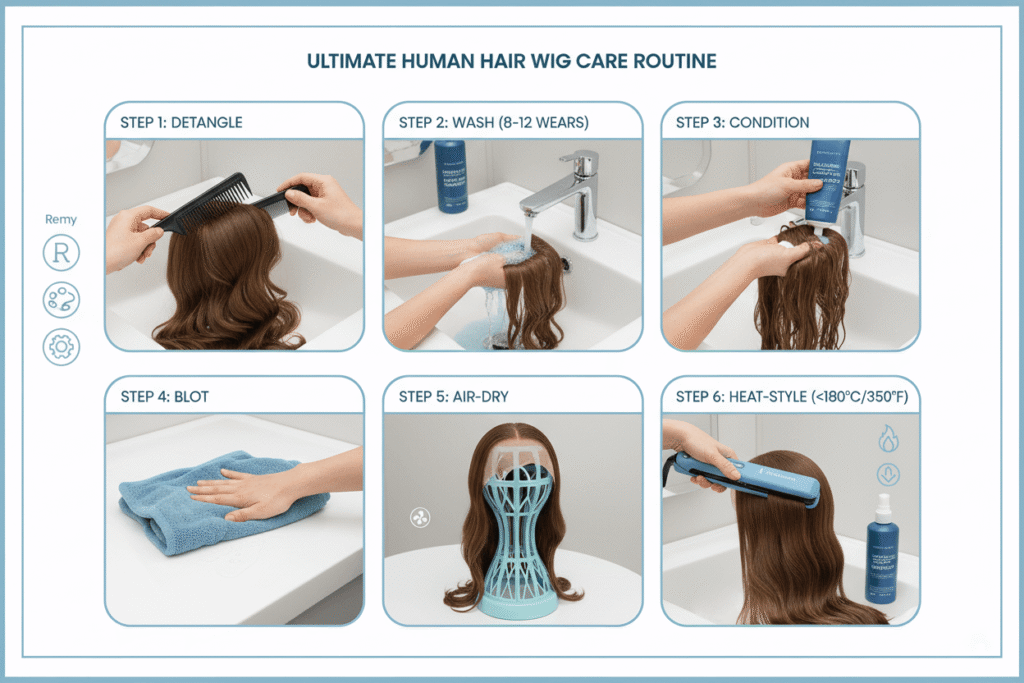
Step-by-step revival: hydrate, smooth, protect
1) Clarify buildup (optional but powerful)
- If the wig feels coated or sticky, start with a gentle chelating or clarifying wash. This removes product film so conditioner can actually penetrate.
- Use lukewarm water—never hot, which lifts the cuticle and increases frizz.
2) Wash with a sulfate-free, moisturizing shampoo
- Fill a basin with lukewarm water and add a small amount of shampoo.
- Submerge the wig and gently swirl. Don’t rub or scrub; friction causes breakage.
- Rinse thoroughly until water runs clear.
3) Apply a silicone-free, rich conditioner
- Work from mid-lengths to ends, avoiding the lace and knot area. Conditioner on the base can loosen knots over time.
- Detangle gently from ends to roots using a wide-tooth comb or wig brush designed for human hair.
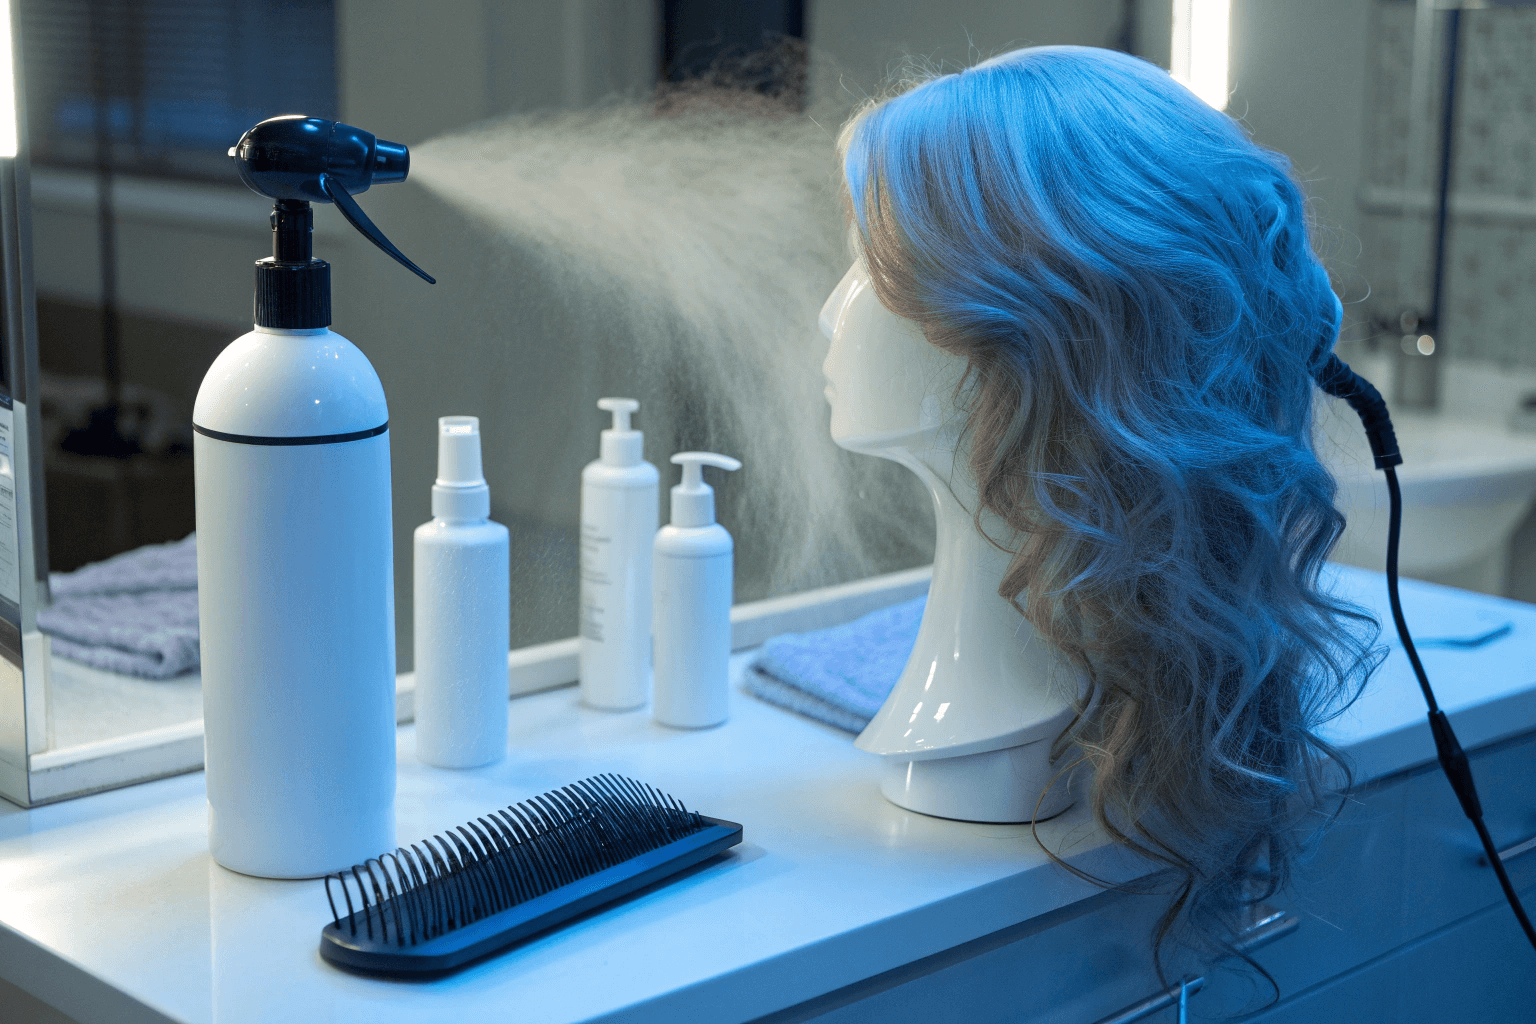
4) Deep conditioning mask with heat (15–30 minutes)
- Generously apply a hydrating mask. I like masks with amino acids and lipids rather than heavy silicones.
- Wrap the wig in plastic, then use gentle heat: a hooded dryer on low or a warm towel around the wrapped wig. Heat helps the mask penetrate and relax the cuticle.
- Don’t leave masks overnight; it can over-soften and weaken fibers.
5) Rinse cool and condition balance
- Rinse with cool water to help smooth the cuticle and add shine.
- If the hair feels too soft afterward, balance with a light protein treatment every few washes to restore structure. Think of it like adding scaffolding so the wig holds its style.
6) Leave-in conditioner or lightweight serum
- Mist a leave-in or smooth a pea-sized amount of lightweight serum through mid-lengths and ends.
- Avoid roots and knots to protect the lace integrity.
7) Light oil treatment (sparingly)
- Add 1–2 drops of argan, jojoba, or fractionated coconut oil to the ends for luster.
- Less is more. Oils can build up and attract dust. Keep it airy.
8) Drying matters
- Gently blot with a microfiber towel. Don’t wring.
- Air-dry on a wig stand or mannequin head away from direct sun.
- If blow-drying, use a heat protectant and keep the dryer on low, moving constantly.
Temperature rules and heat styling
- Always use a heat protectant.
- Keep tools at 300–350°F (150–175°C) for human hair wigs.
- Pass quickly and don’t clamp hard—tension plus heat equals breakage.
Micro details that make a big difference
- Detangle on damp hair after conditioning, not soaking wet. Wet hair is weakest; I once snapped off a chunk of ends by brushing too eagerly straight out of the basin.
- Apply product in sections. I like four quadrants so each part gets love.
- Avoid heavy butters near the nape; that area traps sweat and tangles first.
Tools, products, and smart swaps
| Item / Treatment | Best Choice | Good Alternatives | Notes |
|---|---|---|---|
| Shampoo | Sulfate-free, pH-balanced | Gentle, low-foam cleanser | Clarify first if heavy buildup; then rehydrate. |
| Conditioner | Silicone-free, lipid-rich | Silicone-light (for slip) | Avoid knots/lace base. |
| Deep Mask | Hydration + amino acids | Steam treatment with moisturizing mask | Heat aids penetration; 15–30 minutes is plenty. |
| Leave-in | Lightweight spray | Milk/serum hybrids | Focus mid-lengths to ends. |
| Oil | Argan/jojoba/fractionated coconut | Camellia/grapeseed | 1–2 drops on ends only. |
| Comb/Brush | Wide-tooth comb, loop-bristle wig brush | Detangling paddle (soft bristles) | Never brush when soaking wet. |
How do I address thinning areas without over-plucking?
Thinning shows up most at the crown, part line, and nape. It can be from friction, aggressive plucking to “open up” parts, or simple wear. The instinct is to pluck more for realism—resist it. You can restore density and camouflage without risking bald spots.
Diagnose: shedding vs. sparse density
- Shedding: You’ll see short hairs coming out near knots. Often from rough combing or conditioner on the base.
- Sparse density: The area looks see-through but knots are intact. Usually caused by over-plucking or natural wear.
Gentle solutions that actually work
1) Stop the plucking cycle
- If you’ve already plucked the part, give it a break. Every knot you remove is permanent loss.
- Restore realism by adjusting the part with styling, not tweezers.
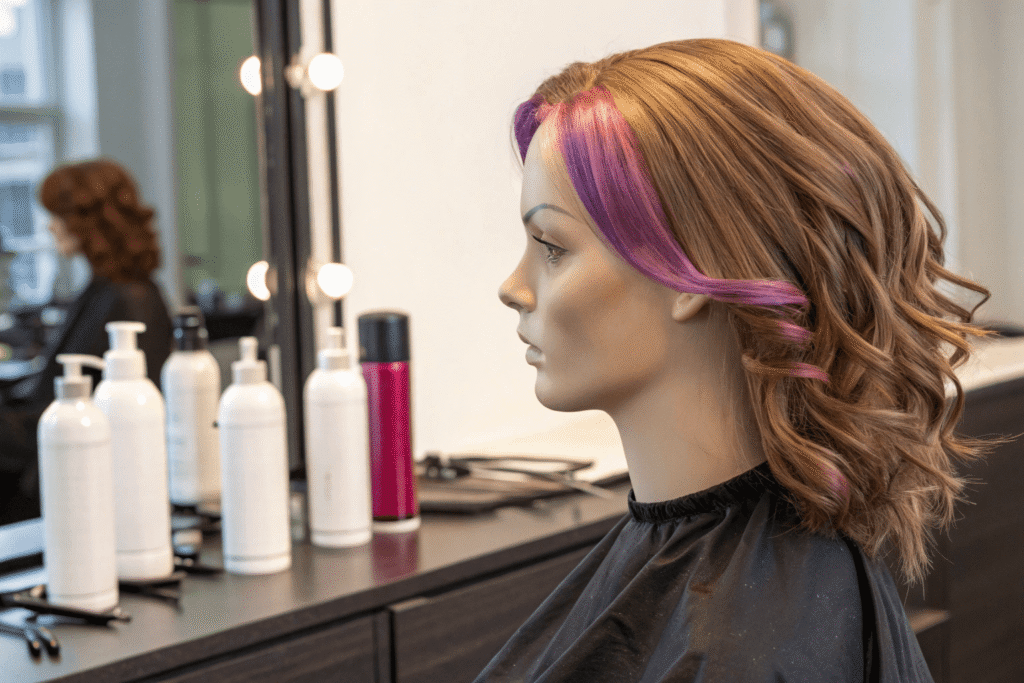
2) Use hair fibers and powder fill-ins
- Lightly tap hair-building fibers (choose a shade close to the wig) along the part line and crown. Set with a flexible spray.
- Matte root powders add soft shadow that makes knots look denser without removing hair.
3) Micro-tapping with mascara or root touch-up
- A tiny brush of mascara or root touch-up pen on lace knots adds depth. Let dry fully before touching. This is a great trick for “grid” visible lace without plucking.
4) Train the part with heat shaping (low temp)
- Put the wig on a block head. Apply a little water or a setting spray to the part area.
- Cover with a comb and pass a blow dryer on low to flatten and redirect hairs. This creates a believable part without removing knots.
5) Ventilation (advanced) or reinforcement (pro)
- If you’re handy, you can ventilate a few strands into sparse areas using a latch hook/ventilating needle and human hair. Work slowly and match direction.
- Otherwise, a professional can add hair to thinning tracks or re-knot lace if shedding is severe.
6) Fit tweaks help density look right
- A snug fit can pull the lace taut and reveal more scalp. Loosen straps slightly or use silicone wig grips to reduce tension that exposes thinness.
Common mistakes to avoid
| Mistake in Thinning Areas | How to Avoid It |
|---|---|
| Over-plucking for a “natural” part | Use fibers/powders and heat-train the part instead. |
| Conditioning the lace base | Keep masks off knots; apply only mid-lengths to ends. |
| Brushing when soaking wet | Detangle damp, post-conditioner; support the base with your hand. |
| High heat at the crown | Keep tools at ≤350°F; use tension minimally. |
| Ignoring friction spots | Protect nape/collar with silk scarf; reduce rubbing from collars. |
My go-to quick fix
I had a unit with a too-wide part after an ambitious tweeze job. Fibers made it dusty-looking at first, so I switched to a matte root shadow powder with a small fan brush. Two passes, set with a light spritz, and the grid disappeared. No plucking needed.
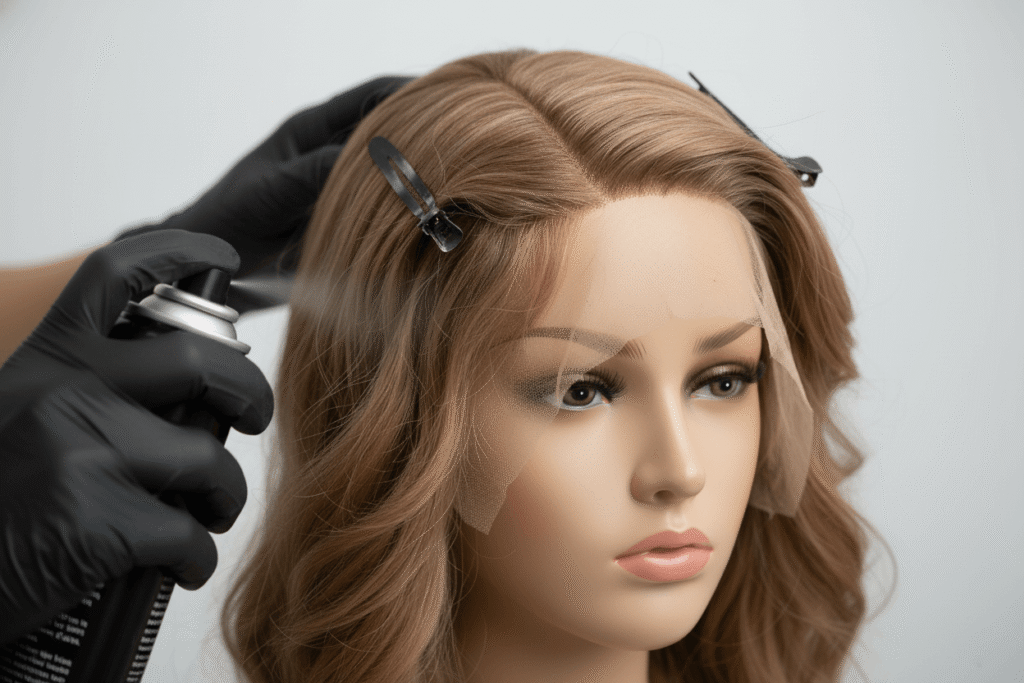
Can I recolor or gloss to refresh faded tones safely?
Yes—and it can completely change the look from tired to polished. But color services on wigs are different from natural hair. The knots are delicate, and the hair might already be processed. Err on the side of gentle.
Safest ways to refresh color and shine
1) Demi-permanent gloss/toner
- Choose an acidic, low-ammonia demi toner to add shine and correct brassiness or dullness.
- Apply through mid-lengths and ends, avoiding the lace base and knots.
- Process per manufacturer (usually 10–20 minutes), then rinse cool and condition.
2) Clear gloss
- A clear, pH-balanced gloss adds high shine without changing color.
- Perfect if your tone is fine but the wig looks matte.
3) Color-refresh masks
- Pigmented masks can revive warmth or cool tones temporarily.
- Test a small section first to avoid uneven absorption.
4) Low-volume developer for subtle shifts
- If you need to deepen or slightly shift tone, work with a professional using low volume (5–10 vol) and demi formulas. Avoid lifting on already fragile hair.
Important cautions
- Protect knots and lace: Apply barrier (petroleum jelly) lightly to the base. Keep color off the lace to prevent knot slippage.
- Strand test first: Human hair wigs can have unpredictable porosity. Test underneath at the nape.
- Skip harsh lighteners on compromised units: Bleach on a dry, processed wig is asking for breakage.
- Rinse cool: Color molecules lock better, and cuticles lay flatter for more shine.
Gloss routine I trust
- Clarify lightly to remove buildup.
- Towel blot so hair is damp—not dripping.
- Apply clear gloss or demi toner in sections from mid-lengths to ends.
- Comb through gently, process low and slow.
- Rinse cool, deep condition briefly, then seal with a lightweight serum.
When should I consider professional refurbishment services?
Sometimes DIY hits a ceiling. If the wig is severely dry, shedding, or the lace is damaged, a salon or wig specialist can extend its life dramatically.
Signs it’s time for a pro
- Persistent dryness after deep treatments
- Noticeable shedding or bald patches around part/crown
- Lace tears, frayed edges, or lifting knots
- Uneven color bands, brassiness you can’t correct
- Ends that snap even with gentle handling
What pros can do that’s hard at home
- Steam hydration and cuticle-smoothing treatments
- Re-knotting lace (ventilation) and closing bald spots
- Track reinforcement or partial weft replacement
- Precision trims to remove brittle ends while preserving shape
- Professional gloss/toner tailored to porous hair
- Cap repairs and lace replacement on high-wear areas
How to choose the right service
- Ask for before/after photos with similar hair density and textures.
- Clarify their approach to knot protection during treatments.
- Request a written quote with specific services (steam, trim, re-knotting, color).
- Confirm turnaround time and maintenance guidelines after you pick it up.
Typical refurbishment flow and timing
| Step | Purpose | Estimated Time |
|---|---|---|
| Consultation + assessment | Identify issues (dryness, shedding, lace) | 15–30 minutes |
| Clarify + deep steam treatment | Hydrate, restore softness | 60–90 minutes |
| Precision trim | Remove split/brittle ends | 20–30 minutes |
| Re-knot/ventilation (if needed) | Restore density in thin areas | 2–6 hours (variable) |
| Gloss/toner | Refresh tone and shine | 45–60 minutes |
| Final style + aftercare plan | Finish and protect | 30–45 minutes |
Step-by-step: My full revival routine for dry human hair wigs
If you want the entire process in one place, here’s the exact routine I follow when a wig feels parched or dull.
Prep
- Place the wig on a mannequin head and secure gently.
- Section into 3–4 parts with clips.
- If coated, do a gentle clarifying wash first.
Wash
1) Fill a basin with lukewarm water.
2) Add a capful of sulfate-free shampoo.
3) Submerge and swirl—no rubbing.
4) Rinse until the water runs clear.
Condition and detangle
5) Apply silicone-free, rich conditioner from mid-lengths to ends.
6) Detangle with a wide-tooth comb from ends upward, supporting the base.
Deep condition with heat
7) Apply a hydrating mask generously to the lengths (avoid the lace).
8) Wrap in plastic; add gentle heat via warm towel or hooded dryer for 15–30 minutes.
9) Rinse cool and blot with a microfiber towel.
Balance and protect
10) If the hair feels too soft, do a quick protein treatment (follow product timing).
11) Mist a leave-in or smooth a lightweight serum through mid-lengths and ends.
12) Add 1–2 drops of argan/jojoba oil to the last inch of ends.
Dry and style
13) Air-dry on a stand away from sun.
14) If heat styling, apply protectant and use 300–350°F.
15) Style gently; avoid high tension at the crown.
Finishing touches
16) Check part density. If sparse, use fibers or root powder—no plucking.
17) Consider a clear gloss or demi toner if the color looks flat.
18) Trim brittle ends professionally to prevent fraying.
Maintenance between wears
- Store on a wig stand and cover with a silk bag to minimize dust.
- Reduce wash frequency; clean every 8–10 wears or when truly needed.
- Refresh with a hydrating mist, focusing on mid-lengths and ends.
Quick troubleshooting guide
- Wig feels coated after conditioning:
- Clarify, then rehydrate. Heavy residue blocks moisture.
- Ends still look frizzy after masking:
- Trim professionally. Split ends can’t be “healed.”
- Wig sheds when you comb:
- Support the base with your hand, detangle damp, and keep products off knots.
- Color looks brassy:
- Use a demi toner and cool rinse; avoid harsh lifting.
- Shine fades quickly:
- Balance hydration with light protein; seal with a clear gloss.
A few real-world tips I’ve learned the hard way
- Always keep color off the lace. A tiny bit of barrier ointment along the part can save you from knot slippage.
- If your climate is dry, run a humidifier in the room where you store your wigs. It quietly reduces static and frizz.
- Hair oils migrate. If you apply oil near the nape, it’ll climb and make the roots look greasy. Ends only.
- The nape rubs on collars—use silk scarves or switch to smoother necklines on long-wear days to cut friction.
- Don’t chase shine with heavy serums. A clear gloss or a few drops of lightweight oil on the ends will outshine a thick, sticky coat every time.
- Keep a “wig first-aid” kit: wide-tooth comb, loop brush, silk bag, mini root powder, leave-in mist, heat protectant, and a microfiber towel. It saves problems on the road.
Final thoughts: bring your wig back to life
Reviving a dry human hair wig isn’t complicated—it’s deliberate. Clarify gently to strip away buildup, saturate with moisture, add a touch of structure, and protect what you’ve restored. Handle thinning areas with restraint and clever camouflage rather than plucking. Refresh faded tones with glosses and demi-permanent color that respect the lace and knots. And when the wig crosses into heavy shedding or structural damage, lean on professional refurbishment.
The first time you follow this process, give yourself extra time and patience. The second time, it’ll feel familiar—almost meditative. Before long, the routine becomes second nature, and you’ll be surprised how easy it is to keep your wig soft, shiny, and ready for every good hair day.
You’ve got this. With a little care and the right steps, even a tired, overworked wig can look and feel brand new.