Many wig wearers notice that blending edges on textured human hair wigs can be the difference between “that’s a wig” and “your hair looks amazing.” If you wear 3C–4C patterns, small mistakes—like overly straight baby hairs, shiny lace, or visible knots—can stand out under bright light or during active days.
The fastest path to a seamless hairline is to match lace tone and curl pattern, create an irregular (plucked) hairline, flatten the root bulk with heat, and set the lace with a melt band. Use minimal, alcohol-free product on edges, trim lace in a soft zigzag, and finish with light deshine and micro-trims to eliminate reflective specks.
Understanding these fundamentals helps consumers achieve a natural finish at home—and gives salons, brands, and distributors a reliable SOP. As a manufacturer and stylist partner, I’ve refined these techniques across HD lace, Swiss lace, and kinky-edge builds to help retailers reduce returns and elevate client satisfaction.
Which gels or edge creams avoid residue on lace?
Selecting edge products that play well with lace is non-negotiable. Residue, white cast, or alcohol-heavy formulas will not only show on HD/transparent lace but also degrade adhesive bonds and dry out textured baby hairs.
What to look for
- Water-based, alcohol-free formulas
- Humectants (aloe, glycerin) for coil definition without crunch
- Clear, non-flaking polymers (PVP/VP/VA in balanced formulations)
- Low oil content near the lace line to avoid lifting adhesives
Pro application sequence (minimize buildup)
1) Clean skin and hairline with micellar water or 70% alcohol (light swipe).
2) Apply adhesive or gel bond first, melt the lace fully (see “Set & Melt” below).
3) After removing the melt band, use a pea-sized amount of edge product directly on hair—avoid the lace.
4) Finish with a light, alcohol-free setting spray, not a heavy spritz.
Lace-safe product short list (by finish)
- Soft, flexible hold: aloe gel, mousse with polymers, clear curl cream (pea-size).
- Stronger hold with no cast: clear edge creams formulated for textured hair, alcohol-free “sport” gels.
- Avoid: heavy beeswax near lace, tinted pomades that can stain knots, high-silicone serums at the hairline.
Common mistakes and fixes
- White residue after drying: too much product or alcohol content. Remove with a damp cotton swab and switch to lighter, clear gel.
- Adhesive slipping: oils from edge control migrated to lace. Keep oils 3–5 mm away from lace edge.
- Crunchy, stiff baby hairs: overuse of strong-hold gel. Dilute with a tiny amount of mousse and re-style.
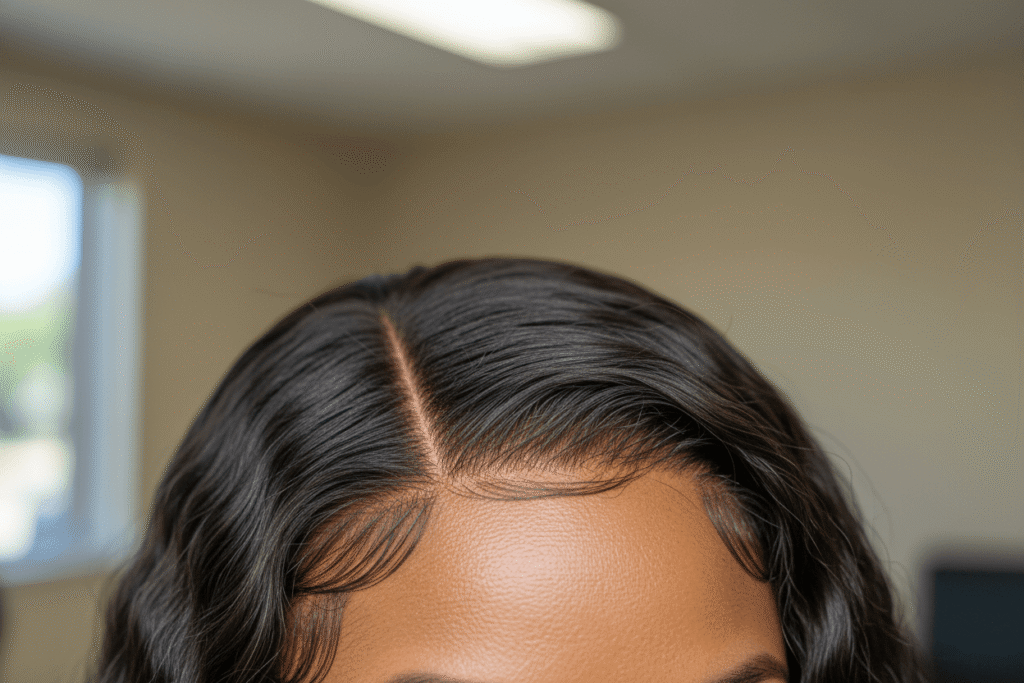
How do I match baby hair thickness to coily patterns I wear?
The fastest giveaway is baby hairs that are too thick or too straight compared to your wig’s texture. As a factory, we pre-pluck some hairlines, but customization is still essential—especially with 3C–4B–4C units.
Match by coil family
- 3C: defined corkscrews; baby hairs should be fine-to-medium, slightly tapered.
- 4A: S-shaped coils; baby hairs medium, airy; light mousse for shape.
- 4B: tighter zig-zag; thinner sections, finger-coiled; minimal gel.
- 4C: very tight, fluffy coils; micro sections, ultra-sparse, avoid over-slicking.
Step-by-step: create natural baby hair density
1) Section: Part 2–4 mm of hair along the perimeter—less for 4B–4C.
2) Pluck: Use pointed tweezers to remove every 3rd–4th hair to create an irregular line.
3) Micro-trim: Cut baby hair to 0.5–1 inch; shorter for 4C. Point-cut for tapered ends.
4) Define: Apply a drop of mousse, finger-coil, then separate. If needed, tap in a touch of clear gel.
5) Airy finish: Lightly fluff with an edge brush; avoid shellac-style swoops on 4-textures.
Quick density guide
| Curl Pattern | Baby Hair Width (band) | Strand Density | Best Styler | Notes |
|---|---|---|---|---|
| 3C | 3–4 mm | Fine–Medium | Light gel + mousse | Keep sheen low for realism |
| 4A | 2–3 mm | Fine | Mousse or soft cream | Slight coil separation looks natural |
| 4B | 1–2 mm | Fine–Sparse | Mousse (trace gel) | Taper ends; avoid heavy swoops |
| 4C | 1 mm | Ultra-Sparse | Mousse only | Let coils spring; “undone” reads real |
Pro tip: If your leave-out is visible, match sheen and coil tension. A quick deshine on the wig (dry shampoo/translucent powder) brings high-luster units closer to natural 4-texture sheen.
Can I use edge banding to set a seamless hairline?
Yes—edge banding (melt banding) is one of the most reliable methods for a flat, undetectable install, especially on textured units that can show micro-lifts at the perimeter.
The “melt” SOP we teach salons
1) Prep & tint
- Choose lace shade close to your skin. If needed, tint the underside with a thin layer of lace tint or foundation that matches your forehead.
- Micro-trim knots or stray lace fibers with precision scissors to reduce light reflection.
2) Flatten bulk
- Use a hot comb or blow-dryer with tension to flatten root bulk at the hairline and part. Work in low heat passes and keep hot tools off the lace to prevent shrinkage.
3) Adhesive/gel layer
- Apply a thin, even layer of lace adhesive or gel along the hairline. Allow to reach tacky/transparent stage.
4) Press & band
- Place the lace and press in with a rat-tail comb. Apply a melt band and keep it snug for 10–15 minutes.
- For maximum hold, repeat a second thin adhesive layer at the perimeter (double melt).
5) Trim lace
- Trim in a soft zigzag close to the hairline to avoid a straight, detectable edge.
6) Finish edges
- Use a fine, curly edge brush and a small amount of mousse to define baby hairs sparingly.
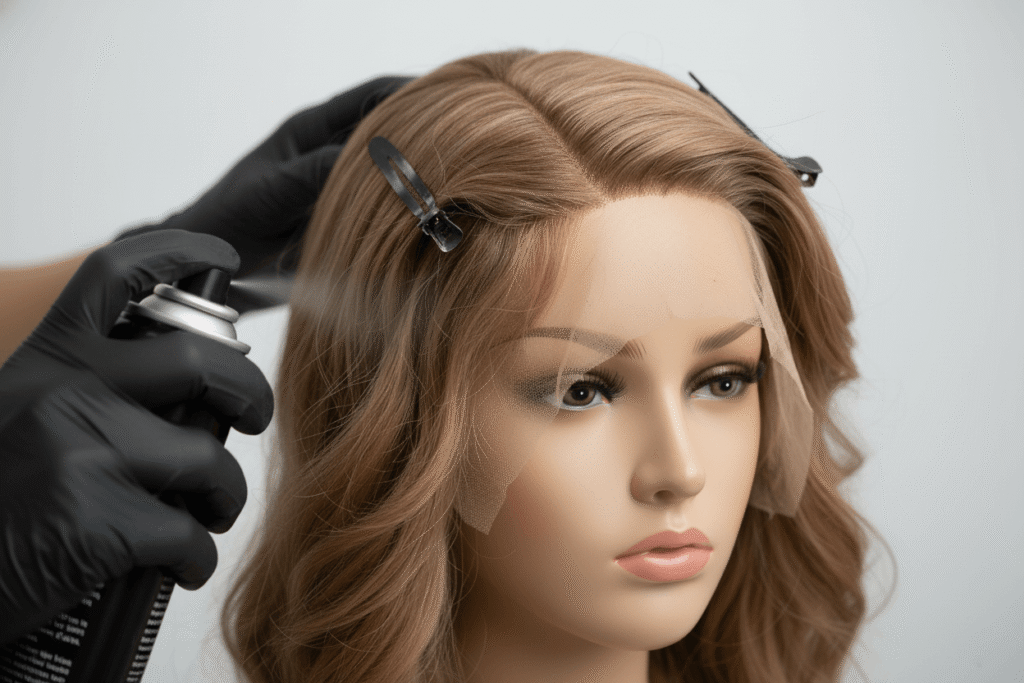
7) Lock & deshine
- Lightly diffuse on low heat. Finish with an alcohol-free light-hold spray. If needed, dust translucent powder through the hairline to cut glare.
Pros and cons of melt banding
| Method | Pros | Cons | Best For |
|---|---|---|---|
| Melt band with adhesive | Long wear, flattest perimeter | Needs careful skin prep | Events, active days |
| Melt band with gel | Gentle on skin, easy removal | Shorter wear | Daily installs |
| No band | Fast, minimal pressure | Higher lift risk | Quick changes/try-ons |
What tools help me avoid lifting during active days?
Whether you’re a gym regular, stylist on set, or running retail demos, active days test your install. Sweat, heat, and friction can loosen bonds—so the right toolkit and schedule matter.
The active-day kit (what we pack for shoots)
- Alcohol wipes or witch hazel pads (prep and quick resets)
- Lace glue or strong-hold gel + precision nozzle
- Melt band and a soft elastic head wrap
- Mini blow-dryer with cool/low heat and diffuser
- Fine mist bottle (for reactivating mousse without saturation)
- Edge brush/comb with narrow bristles for coils
- Precision scissors for micro-trims of stray lace fibers
- Translucent powder or tinted lace powder and a small brush
- Light, alcohol-free setting spray
- Dry shampoo for quick deshine on glossy hair
Maintenance rhythm for long wear
- Morning: Check perimeter, press with comb, 30–60 sec cool air, re-band while doing makeup.
- Midday: Tap away moisture with tissue, cool-blow 15–20 sec, micro re-glue only where needed.
- Evening: Remove band, dust deshine powder if lace looks shiny under indoor lighting.
Heat and humidity tactics
- Keep products minimal at the lace. Excess oils or creams migrate and lift bonds.
- Choose HD lace for the most realistic melt; medium brown lace can be better for deeper tones if tinting is limited.
- For heavy sweat, consider a gel-based bond for daily removal; for multi-day security, a thin adhesive layer with double melt.
A manufacturer-stylist install blueprint (10-step quick reference)
1) Choose a lace that matches your skin tone and tint it if needed to reduce the visibility of the lace against textured hairlines.
2) Pluck the hairline gradually in small sections to create a soft, irregular density that mimics natural growth.
3) Use a hot comb or blow-dryer with tension to flatten the wig’s root area and remove bulk at the part and hairline.
4) Apply a thin layer of lace adhesive or gel and press lace into the skin with a melt band until fully transparent.
5) Cut the lace in a zigzag pattern close to the hairline to avoid a straight, detectable edge.
6) Use a fine, curly edge brush and a small amount of mousse to define baby hairs sparingly for a natural perimeter.
7) Match texture and curl pattern to your leave-out or edges (e.g., 3C vs. 4B) to ensure uniform blending in frizz, sheen, and coil size.
8) Lightly deshine with dry shampoo or translucent powder if the wig is glossier than your natural hair to reduce contrast.
9) Micro-trim stray lace fibers and short knots with precision scissors to eliminate reflective specks under bright light.
10) Set the blend by diffusing on low heat and finish with a light-hold, alcohol-free spray to maintain softness and avoid crunch.
Fiber, lace, and finish: quick comparison for buyers and salons
| Component | Best Choice for Seamless Edges | Why It Works | Watchouts |
|---|---|---|---|
| Lace | HD lace or fine Swiss | Disappears on skin; thinnest profile | Fragile—handle gently during plucking |
| Hairline | 4C/kinky edges option | Matches coily patterns, realistic baby hair | Requires sparse styling, not slicking |
| Texture | Match to leave-out (3C–4C) | Uniform frizz, sheen, coil size | Deshine glossy units to match bio hair |
| Hold | Alcohol-free gel or thin adhesive | Clean melt with low residue | Keep oils away from lace edge |
| Finish | Mousse + light set spray | Soft, touchable, not crunchy | Overproduct = buildup on lace |
Conclusion
Blending edges on textured human hair wigs comes down to realistic density, accurate tone, controlled root volume, and a clean melt—then maintaining that finish with lace-safe products and smart touch-ups. From years of supporting salons and OEM partners, we’ve found that sparse, softly defined baby hairs and a low-shine finish outperform heavy gels and straight, uniform edges every time.
If you’re a salon, retailer, or distributor, standardizing the melt-banding workflow and stocking alcohol-free, clear stylers can dramatically reduce rework and returns. For end users, these steps mean faster installs and a hairline that reads “natural” in every light—even on your most active days.