If you’ve ever washed a human hair wig and ended up with frizz, loose knots, or a cap that somehow stretched overnight, you’re not alone. The first time I washed my favorite unit, I treated it like my natural hair—scrubbed the lace, used hot water, and wrung it out in a towel. Big mistake. It air-dried into a fuzzy halo, and I noticed shedding around the part that hadn’t been there before. That’s when I learned that human hair wigs need their own method—gentler, more deliberate, and laser-focused on protecting knots and lace.
Detangle from ends to roots before wetting, wash in cool to lukewarm water using a sulfate-free wig-safe shampoo, condition only from mid-lengths to ends for 3–5 minutes, and air-dry on a stand with minimal heat. Always rinse downward, avoid scrubbing the lace or knots, and finish with light, alcohol-free styling products.
If you follow the steps below, your wig will feel softer, last longer, and withstand daily wear without shedding or losing shape. Let’s walk through it with the same method most salons use—the basin dip method—plus a few tricks I wish I’d known from the start.
How do I detangle before wetting to avoid shedding?
Detangling dry hair before water touches the fiber is non-negotiable. Water can tighten existing knots and “lock” tangles into place, which makes breakage more likely.
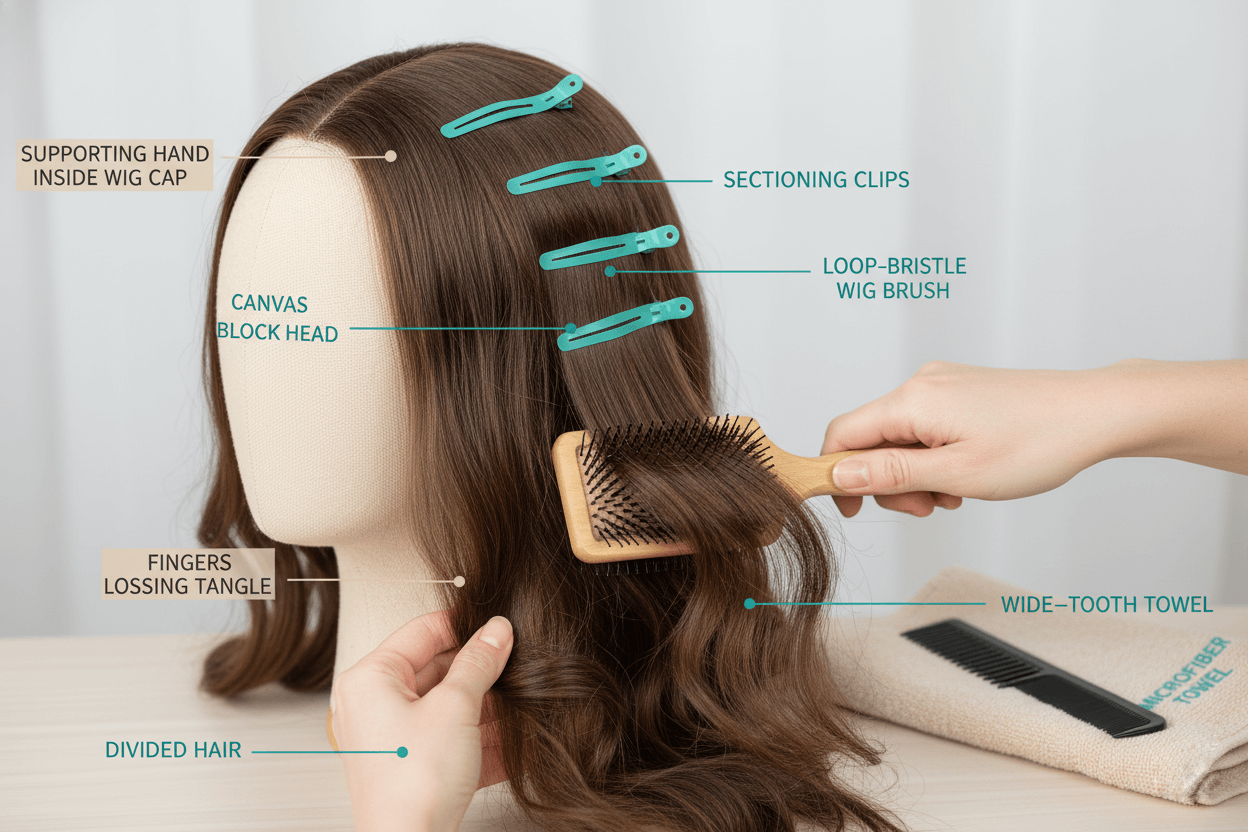
Tools you’ll want on hand
- Wide-tooth comb or wig brush (looped bristles are great)
- Paddle brush for smooth finishes (optional)
- Wig stand, mannequin head, or your hand inside the cap
- Sectioning clips
- Microfiber towel
Step-by-step detangling (ends to roots)
- Secure the wig: Place it on a canvas block or hold it with one hand inside the cap for control. If it’s a lace front, be gentle around the hairline.
- Section the hair: Divide into 2–4 sections. Clip away what you’re not working on to reduce pulling.
- Start at the ends: Always. Work in small strokes upward. If your brush snags, stop and use fingers to loosen the tangle rather than forcing it.
- Move up gradually: Once the ends are smooth, brush mid-lengths, then roots. Support the hair with your free hand to avoid tugging on knots.
- Check the nape: The nape is the tangle hotspot, especially if you wear collars or scarves. Be patient here and use shorter brushing strokes.
- Finish with a pass-through: When all sections are smooth, give the wig a final gentle brush from roots to ends to align the cuticle direction.
Tips that save the hairline
- Keep tension off the lace: Pin the lace lightly when on a block head, or hold the cap instead of the lace while brushing.
- Use slip if needed: For stubborn dry tangles, mist with a small amount of wig-safe detangling spray before brushing. Avoid saturating.
- Close clips: If your wig has combs or clips inside, snap them shut before detangling so they don’t snag on hair.
I once made the mistake of yanking through a knot near the part line. It didn’t snap the hair—but it loosened the knot. Two washes later, that area started shedding. Take it slow. The extra two minutes here will prevent months of frustration.
Which water temperature protects my knots and lace?
Water temperature affects both the integrity of the cap and the hair’s cuticle. Hot water can relax knots, warp lace, and strip moisture from the hair. Cool to lukewarm is the sweet spot.
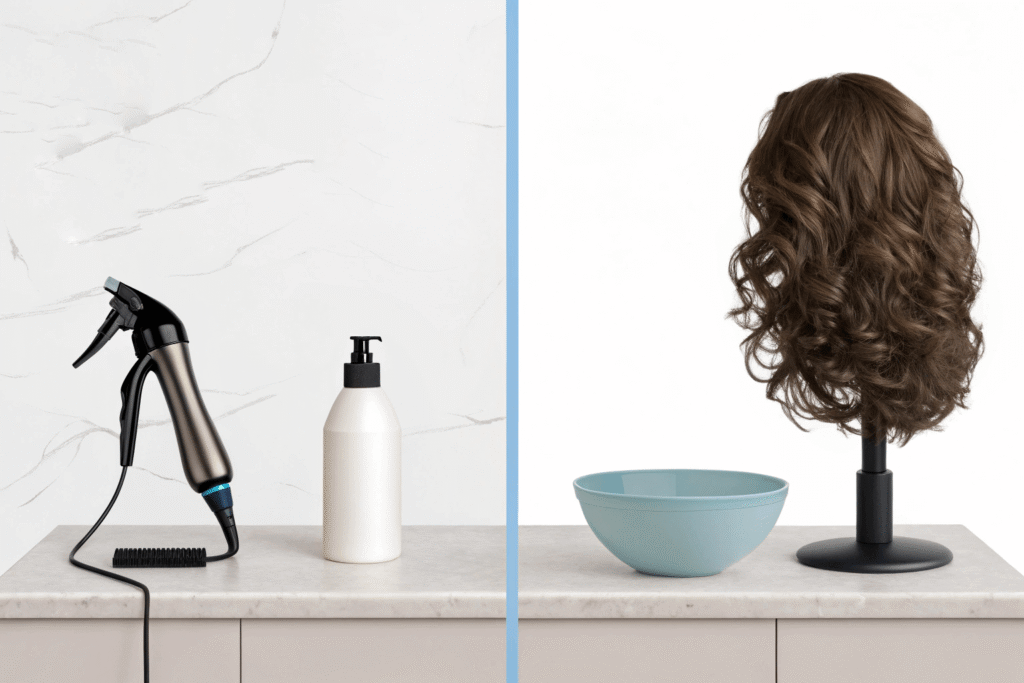
The basin method: washing without friction
- Fill the basin: Use cool to lukewarm water—think comfortable tap water, not warm shower heat.
- Mix shampoo first: Add a small amount (around 1 tablespoon) of sulfate-free, wig-safe shampoo to the water. Swirl to evenly disperse.
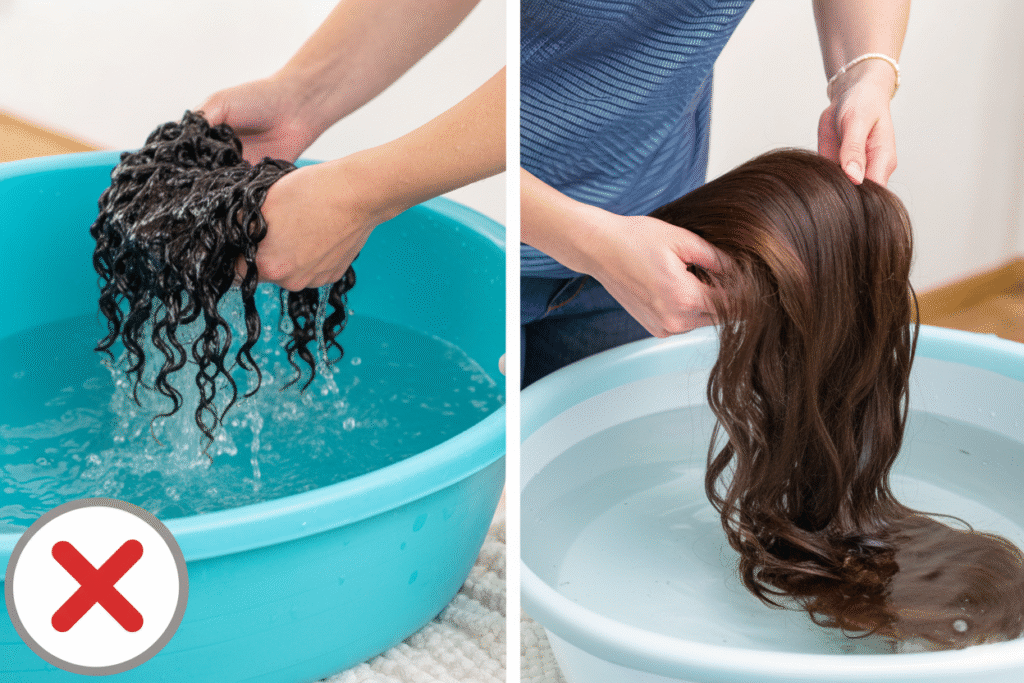
- Turn the wig inside out: Optional but useful—this positions the cap toward the water and protects the outer hair from aggressive suds.
- Submerge and swish: Gently move the wig through the water for 1–2 minutes. Do not rub, twist, or bunch. Excess friction roughs up the cuticle and causes frizz.
- Focus on the cap: Oils, makeup, and sweat collect inside. Use fingertips to lightly massage the cap mesh. Avoid scrubbing lace or pressing hair through it.
- Rinse downward: Drain the basin. Refill with clean cool water or use a faucet at low pressure. Hold the wig by the nape and let water flow from root to tip. Rinse until the water runs clear.
Why cool-to-lukewarm matters
- Protects knots: Cooler temps help keep hand-tied knots snug.
- Safeguards lace: Lace retains structure better without heat stress.
- Preserves shine: Cooler rinses lay the cuticle flat, adding smoothness.
Shampoo selection notes
- Sulfate-free and wig-safe: These reduce drying and frizz.
- Avoid clarifying unless necessary: Clarifying shampoos can strip too much. Use only for product buildup, and follow with a rich conditioner.
- Less is more: A tablespoon is usually enough for one wash.
How long should I leave conditioner on for best results?
Conditioner is where softness and slip return—if you apply it correctly. The trick is to nourish the lengths and ends while keeping knots tight and the cap clean.
The conditioning strategy
- Squeeze out excess water: After rinsing shampoo, gently blot with a microfiber towel. Dripping wet hair dilutes conditioner and wastes product.
- Apply mid-lengths to ends: Keep conditioner 2–3 inches away from the roots and lace knots. Focus on areas that feel dry or rough.
- Comb-through optional: Use a wide-tooth comb to distribute evenly. Detangle softly while saturated with conditioner for minimal breakage.
- Timing: Leave on for 3–5 minutes, or as directed on product. For very dry wigs, you can extend to 7–10 minutes.
- Deep condition occasionally: Place the wig in a plastic bag for gentle heat retention and leave for up to 20 minutes. Do not deep condition the cap or knots.
- Cool rinse: Rinse thoroughly with cool water in the direction of hair flow until the slick residue is gone. Residual conditioner near the cap can loosen knots over time.
What about silicones?
- Wig-safe silicones can be helpful for slip, shine, and cuticle alignment. They reduce friction during styling and are common in professional wig-care routines.
- If you prefer silicone-free, use rich, moisturizing formulas with oils or butters—but be prepared to detangle more gently.
Leave-ins and heat protectants
- After rinsing and blotting, apply a light, alcohol-free leave-in to the ends only.
- If you plan to heat style later, add a heat protectant while the hair is damp. Focus on the mid-lengths and ends.
Quick reference table: conditioner timing and purpose
| Step | Purpose | Estimated Time |
|---|---|---|
| Apply mid-lengths to ends | Add slip, reduce friction, hydrate | 1 minute |
| Comb-through (optional) | Even distribution, gentle detangle | 1–2 minutes |
| Let sit | Moisturize; soften the fiber | 3–5 minutes (up to 10 if very dry) |
| Cool rinse | Seal cuticle, remove residue near cap | 1–2 minutes |
What drying method prevents frizz and cap deformation?
Wigs are most fragile when wet. Drying is where many people accidentally stretch the cap or create frizz. Think low heat, gravity-safe positioning, and downward airflow.
Post-rinse: blot, don’t wring
- Place on a microfiber towel: Lay the wig flat, fold the towel over, and press—no rubbing. Microfiber reduces friction compared to terry cloth.
- Remove excess water: Aim for “damp, not dripping” before putting it on a stand. Heavy water weight can stretch the cap if placed on a head too soon.
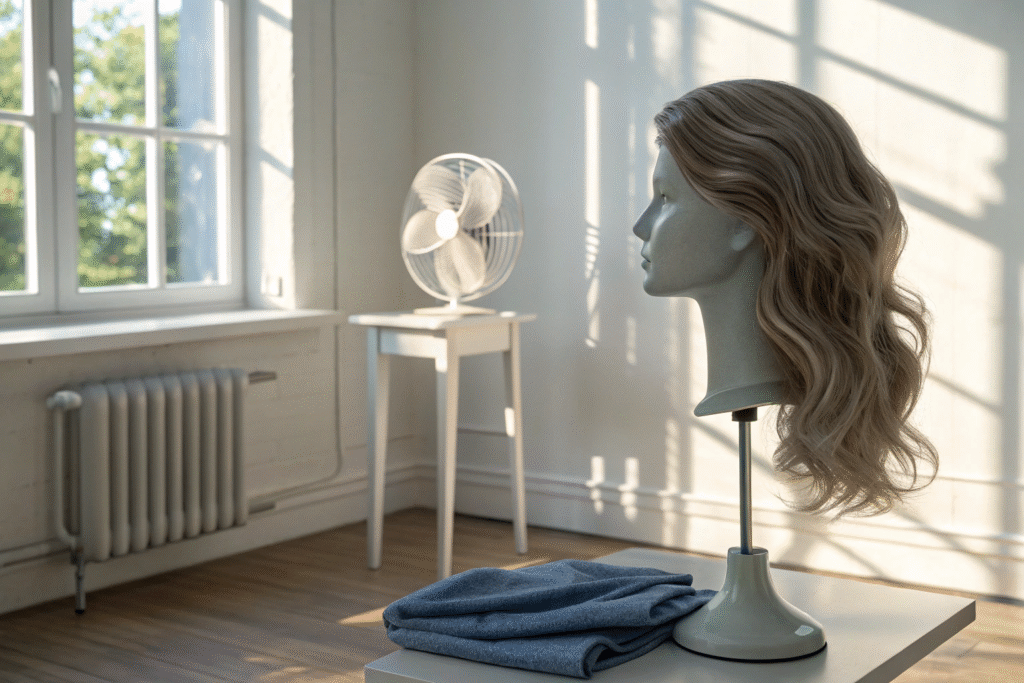
Air-dry is best
- Use a wig stand: A wire stand or open-frame stand allows airflow through the cap. Avoid solid Styrofoam heads for drying as they trap moisture.
- Shape while damp: Align parting, smooth the hair downward with fingers or a soft brush, and let gravity help.
- Avoid sun and high heat: Direct sun or heater vents can dry hair too fast, causing frizz and brittleness.
If you must blow-dry
- Low heat, low speed: Attach a concentrator nozzle and keep airflow directed downward from roots to ends.
- Keep distance: 6–8 inches from the hair helps prevent heat damage and flyaways.
- Use a round brush gently: Only if the hair is mostly dry and you’re smoothing the ends. Don’t tug near the lace.
Final styling and finishing
- Low-to-medium heat tools: Keep temperatures conservative (often 300–340°F/150–170°C, depending on the hair and manufacturer). Always test on a small section.
- Light products only: Alcohol-free serums or a small amount of argan oil on the ends will add gloss without buildup.
- Avoid heavy sprays near the lace: Stickiness makes cleaning harder and can attract lint or makeup.
Common drying mistakes vs. how to avoid them
| Mistake | How to Avoid It |
|---|---|
| Wringing or twisting | Blot with a microfiber towel; press gently |
| Drying on a solid head | Use an open wig stand for airflow |
| High heat blow-drying | Use low heat, downward airflow, and a nozzle |
| Overloading product | Apply light, alcohol-free formulas on ends only |
| Ignoring the cap weight | Blot thoroughly before placing on any stand |
The complete step-by-step process: washing and conditioning a human hair wig
Here’s the full workflow you can follow every time. I’ve included small details that make a big difference.
Step 1: Prep and detangle (dry)
- Close any clips or combs inside the cap.
- Place the wig on a stand or hold inside the cap—not by the lace.
- Detangle from ends to roots with a wide-tooth comb. Take your time on the nape and behind the ears where tangles hide.
Step 2: Clean the lace (if you use adhesive)
- Gently remove glue or tape before washing using wig-safe adhesive remover or 91% isopropyl alcohol on a cotton pad.
- Wipe until the lace feels clean—not tacky. This prevents gummy buildup during washing.
Step 3: Prepare the wash bath
- Fill a basin with cool to lukewarm water.
- Add a small amount of sulfate-free, wig-safe shampoo and swirl to create a gentle bath.
Step 4: Submerge and wash
- Turn the wig inside out (optional).
- Submerge fully and swish gently for 1–2 minutes—no scrubbing.
- Use fingertips to lightly massage the inside cap where oils accumulate. Avoid aggressive scrubbing of lace or knots.
Step 5: Rinse thoroughly
- Drain the basin and refill with clean water, or use a low-pressure tap.
- Hold the wig by the nape and let water flow downward from roots to ends.
- Rinse until water runs clear and hair feels free of shampoo.
Step 6: Condition strategically
- Blot excess water so the hair is damp.
- Apply conditioner from mid-lengths to ends, avoiding the cap and knots.
- Leave on for 3–5 minutes (up to 10 for very dry hair).
- Optionally comb through gently to distribute.
- Rinse with cool water, downward, until no slick residue remains.
Step 7: Dry the right way
- Blot with a microfiber towel—no twisting or wringing.
- Place on a wig stand that allows airflow. Shape the part and smooth the hair downward.
- Air-dry away from direct sun or high heat sources.
Step 8: Protect and style
- When damp, apply a small amount of leave-in or heat protectant to ends.
- Once fully dry, style with low-to-medium heat tools. Test temperature on a small section first.
- Finish with light, alcohol-free products to maintain softness and shine.
Tools and materials vs. smart alternatives
| Tools & Materials | Why They’re Ideal | Alternatives |
|---|---|---|
| Sulfate-free, wig-safe shampoo | Cleans without stripping; gentle on knots | Mild baby shampoo (sparingly) |
| Moisturizing conditioner | Restores slip and softness | Silicone-free conditioners (more detangling effort) |
| Wide-tooth comb / wig brush | Minimizes breakage | Fingers + detangling spray |
| Microfiber towel | Reduces friction and frizz | Old cotton T-shirt |
| Wig stand (open-frame) | Improves airflow, prevents mildew | Towel on counter + flip and dry both sides |
| Heat protectant | Shields hair during styling | Avoid heat; air-dry and use rollers |
| Leave-in conditioner (alcohol-free) | Maintains moisture on ends | Light hair serum (one pump max) |
Extra care tips that extend lifespan
- Wash cadence: Every 7–14 wears depending on sweat, product use, and environment. Over-washing dries hair out.
- Night care: Never sleep in a wet wig. If you must store it damp, place on a ventilated stand until fully dry.
- Travel: Put the wig in a satin bag; carry a folding stand. Dry hotel air can be harsh—bring a mini leave-in.
- Color-treated units: Use color-safe formulas and reduce heat. These wigs can be more porous and prone to dryness.
- Cuticle direction matters: Always brush and rinse downward. Working against the grain raises the cuticle and invites frizz.
- Nape friction: If you wear high collars or scarves, detangle the nape area daily to prevent matting.
- Product discipline: Heavy oils and hairsprays near the lace cause buildup and cleaning headaches. Keep roots clean.
Troubleshooting: if something goes wrong
- Persistent frizz after washing:
- Try a cool-water rinse and a pea-sized amount of serum on the ends.
- Consider a low-heat pass with a nozzle, directing airflow downward to smooth the cuticle.
- Sudden shedding at the hairline:
- Check for conditioner contamination near knots; reduce product near roots next wash.
- Avoid brushing the lace area aggressively. Support the base when detangling.
- Cap feels stretched:
- Blot more thoroughly before placing on a stand or head.
- Avoid heavy water weight on a block head; use a lightweight wire stand while drying.
- “Bird’s nest” tangling:
- Rewash using the basin method and a slip-rich conditioner.
- Detangle saturated with conditioner from ends upward, very gently.
Quick answers to your four core questions
- How do I detangle before wetting to avoid shedding?
- Detangle dry from ends to roots using a wide-tooth comb or wig brush. Support the cap, avoid pulling on lace, and work in sections.
- Which water temperature protects my knots and lace?
- Cool to lukewarm water. Hot water can loosen knots and warp lace, while cooler water helps preserve structure and shine.
- How long should I leave conditioner on for best results?
- 3–5 minutes for routine care; up to 10 minutes for very dry wigs. Keep conditioner away from the cap and knots.
- What drying method prevents frizz and cap deformation?
- Blot with a microfiber towel, air-dry on an open wig stand, and avoid high heat. If blow-drying, use low heat with a downward-directed nozzle.
You’ve got this
The first wash can feel like defusing a tiny bomb—especially if you’ve invested in a high-quality human hair unit. But once you follow this gentle routine a couple of times, it becomes second nature. Your wig will stay smooth, shiny, and secure at the hairline, and you’ll avoid the sneaky issues like shedding, matting, and a stretched cap.
Take it slow, respect the knots, keep water cool, and let gravity help. You’ll be surprised how easy it becomes after the first try.